Hardy perennials offer the best potted value, says Ruth
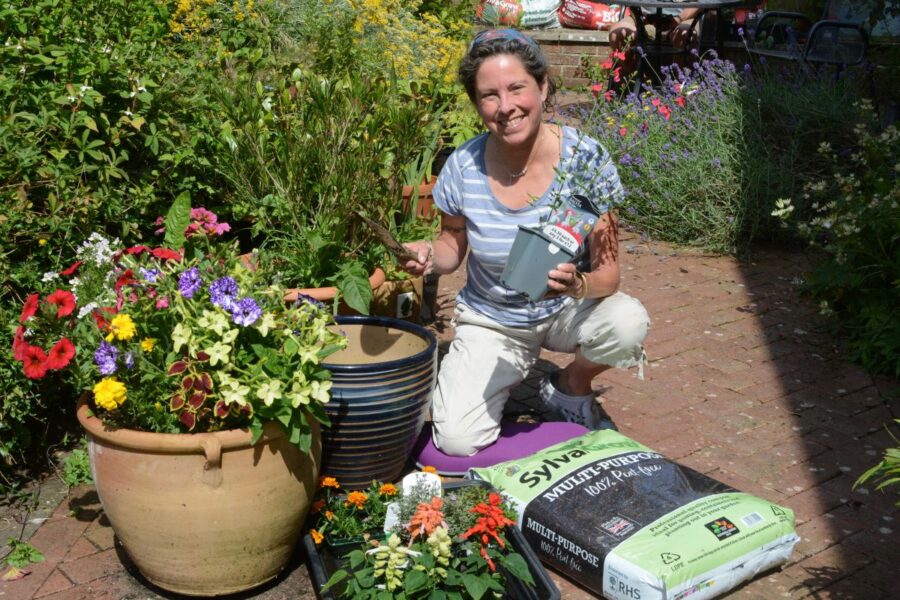
Early in the summer I planted a couple of patio containers of bedding, with nicotiana, petunia, nemesia and marigold. They look fantastic, a riot of colour despite the indifferent weather (or maybe because of all the rain) but with autumn lurking in the wings and the bank holiday on the horizon, I’ve decided to create a late summer pot to add colour for the next few months.
I don’t go to the garden centres all that often because I usually buy plants from the market, where they are generally cheaper, or propagate my own, so the increase in prices since I’d last popped in gave me quite a shock.
With this in mind, I spent most of my money on perennials because they can be reused and added to a border when I want to reuse the container for something else.
I bought a ‘Hotlips’ salvia, which has been on my wishlist for ages, a tray of bedding salvias that I aim to nurse through the winter, some cheap(ish) and cheerful tagetes and a couple of herbs.
These are a hardy silver-leaved thyme and a hesperozygis ‘Midnight Mohito’. This is an attractive herb with purple flowers and mint-scented leaves. It doesn’t take kindly to the coldest weather so come autumn I’ll pot it up and move it into the greenhouse.
I’m reusing an old container which I’ve washed out to remove as many pests and possible disease problems as I can, and lined its base with crocks.
I’m using Sylvagrow peat-free multipurpose compost to which I’ve added a little fertiliser to give the plants an extra boost, and some water-retaining crystals which will make watering easier down the line if we get a hot, dry Indian summer and early autumn, as seems to be the trend these days.
When buying your plants, always choose healthy ones with plenty of flower buds. Avoid any with pale leaves or moss growing over the compost as this shows they have been languishing in the shop or garden centre for too long.
Stand them all in water, still in their pots, for at least 30 minutes before planting so their roots and compost are saturated and they are easier to slide from their containers.
Always raise your pots off the ground so excess water can escape easily. I try to set the pot where I want it to go before planting, as sliding the feet under it is easier to do when it’s emptier and lighter.
I usually start feeding container plants with a potassium-rich tomato feed around 4-6 weeks after planting to further encourage flowering, and deadhead blooms regularly to keep buds forming.
Watch out for pests, especially slugs and snails that lurk under leaves and around the rim of the pots. If plants suddenly wilt and die, they may have had their roots chomped by the cream-coloured vine weevil grubs.
These brown-headed menaces can be treated with a nematode watered onto the compost, and any totally stricken plants can easily be replaced to remove any gaps.
Plant a pot
Instant summer patio colour
1. Fill the pot with peat-free compost to within 5cm (2in) of the rim. Add a little fertiliser and water-retaining crystals.
2. Gently tease out the roots of your central feature plant and add it to the pot, firming the compost around it.
3. Now add the edging and trailing plants. Don’t worry about gaps, they will soon grow to fill them.
4. Top the pot with compost if needed and water well to settle the plants. Keep the compost damp, not sodden, and deadhead regularly.
Find more tips, advice and articles like this at the Amateur Gardening website. Subscribe to Amateur Gardening magazine now

