Adam explains how to create a lovely container creation
As well as tending my plants, I love getting creative in the garden; from turning wooden pallets into planters, to seeing what I can make out of odds and ends I find lying around, it’s all incredibly empowering and worthwhile. Sometimes though, I like to go for a bit of good honest fun and while browsing online I spotted some wonderful small succulents and this project idea popped into my head, full formed.
……………………….
Make sure to check and use appropriate plants and compost for growing indoors or outdoors, depending on where you want your succulent garden to be. If you’re planning on doing this in summer then it won’t matter all that much, as long as you could bring it inside during winter.
……………………..
Step 1 – Choose your preferred container
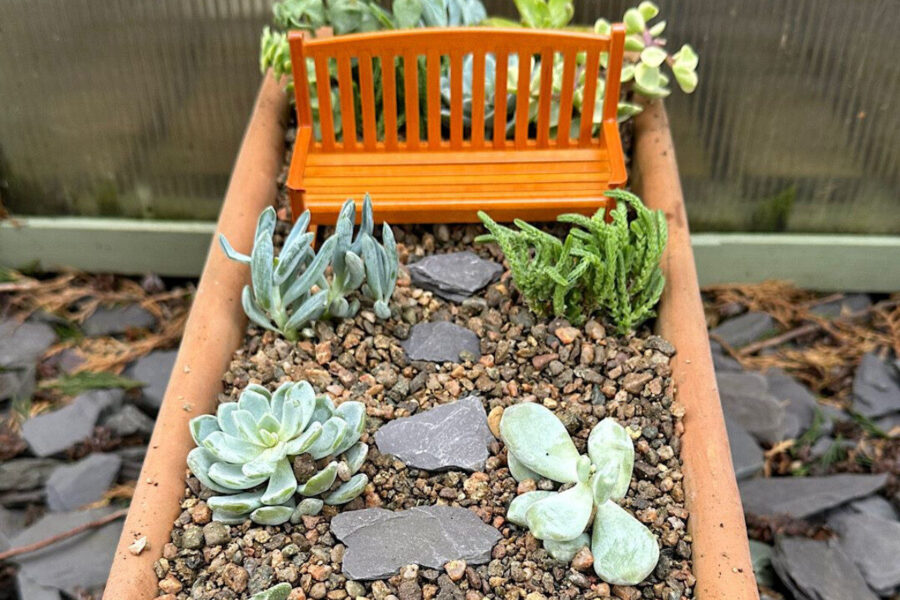
You could opt for a wide and shallow terracotta bowl, or a deep ceramic one, you just need to picture the end goal of your succulent garden and how you would like it to look. For mine, I didn’t go out and buy anything special – I just picked a terracotta trough that I’d had unloved, and a bit dusty, at the back of the shed for ages.
Step 2 – Think about your perfect planting
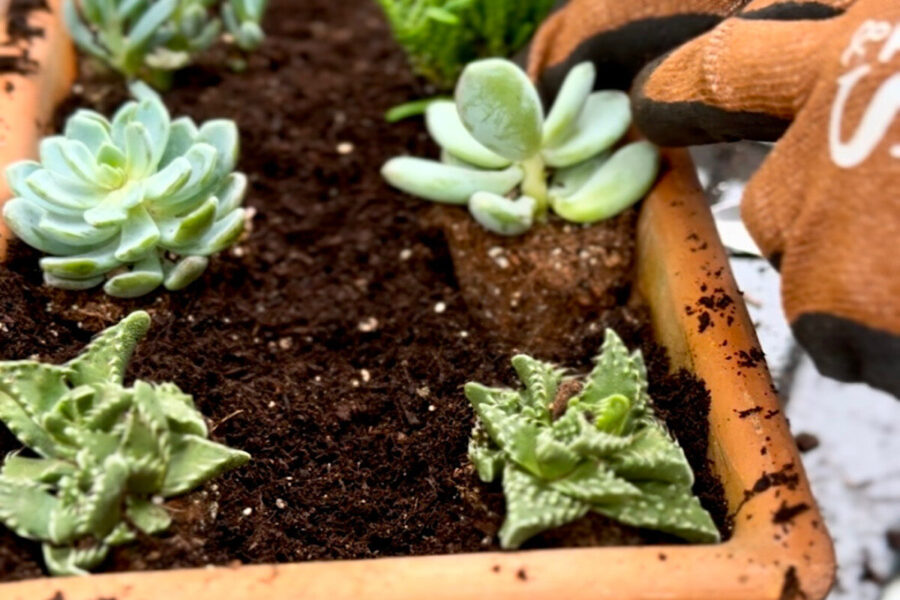
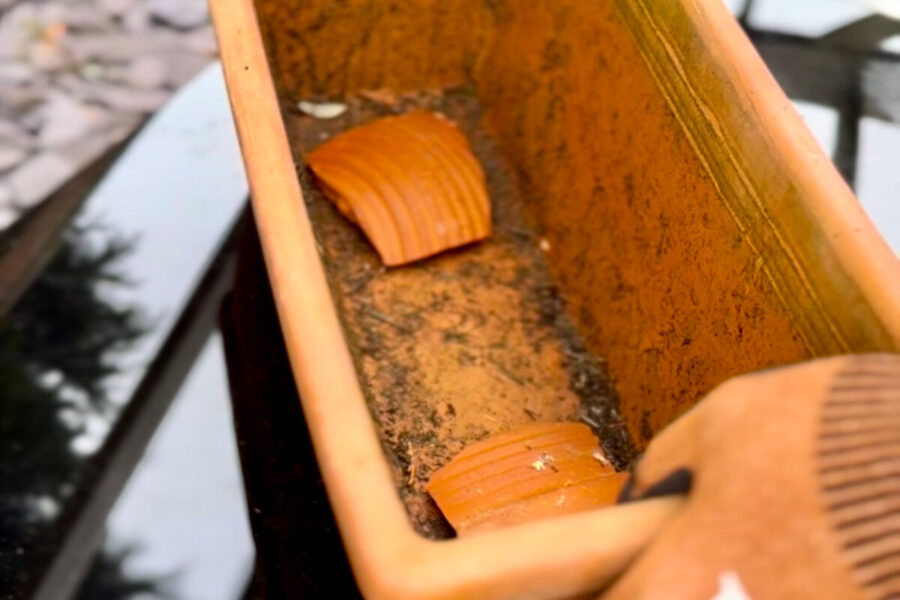
Add crocks to cover any holes at the bottom of your chosen garden to be, and fill your container with compost. Then the fun begins: the planting up! You’ve got a choice to make this an indoor creation or an outdoor one, depending on your preference. I’ve used a collection of Aloe vera and other wonderful succulents, destined for an indoor space. So, this will sit in my greenhouse to protect it from the brunt of the bad weather.
Step 3 – Using great gravel
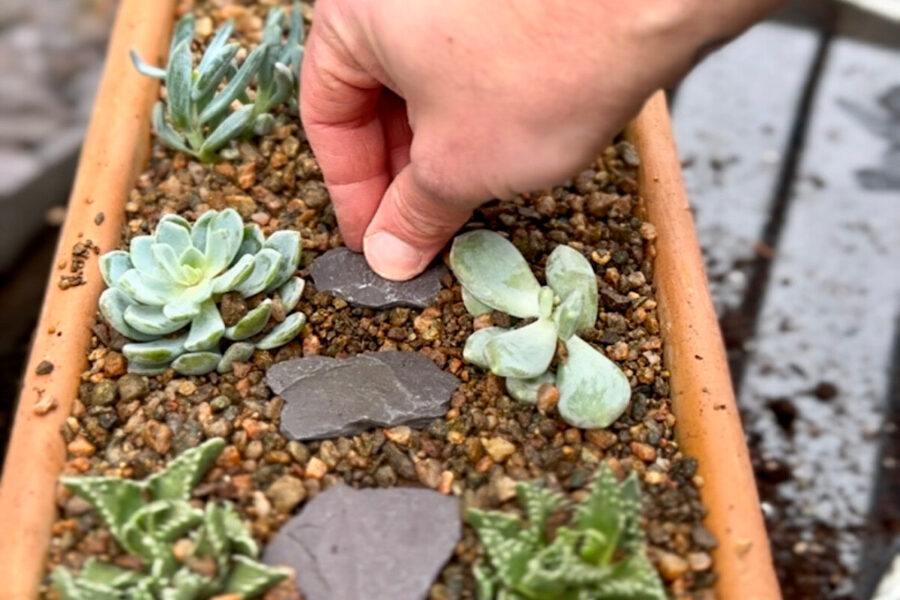
For this design, I’ve opted for plants at the back and down each side of the trough. I’ve topped mine with a thin layer of horticultural grit, the type you’d mix with compost for drainage, but you could even use small gravel or decorative pebbles. If you’d like to make a really jazzy one, then how about coloured gravel used for fish tanks?
Step 4 – Some final flourishes

When you’re happy with where your plants are and the positioning of your topping, then you can use large stones or slate pieces, as I have, to form little stepping stones across the topping. The finishing touch on my garden was the addition of a small wooden bench, which is actually a dolls house bench I found in a charity shop. But you can use any manner of things to add some personality to yours and many garden centres now sell small doors and figures that are designed for children’s fairy gardens.
Find more tips, advice and articles like this at the Amateur Gardening website. Subscribe to Amateur Gardening magazine now